I’ve been exploring two things today: a sort of 2D to 3D tunnel concept I’d like to render and; more experiments photographing bits of trees for my ‘overlaying stuff’ projects (working title…)
2D to 3D Dimension Jump / Torus
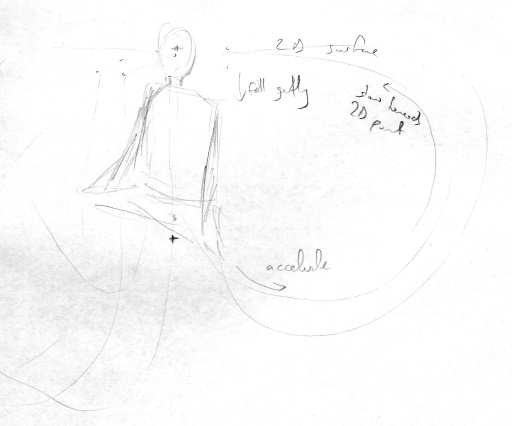
My intial sketch was a sort of hyperbolic curve defined by points gently falling down from a ‘flat’ 2D surface. The points fall slowly to accelerate outwards in a trumpet horn shape. Rather than the curve ending at the horn’s end, the points gradually make their way back to the 2D surface. In the initial sketch I envisaged a human form with the centre of the head as the centre of the 2D surface, and the tail/groin where the shape opens out:
I thought I could do this in a Jupyter notebook but couldn’t find a decent scene graph to poke around with values in real-time. So I installed Blender and watched a few tutorials – it’s been a long time since I last used it (for mov1, mov2) and the UI feels a lot more friendly these days. That’s apart from how one closes a window panel which drove me mad; you have to drag the toolbar of a window over the window it’s going to ‘absorb’, but it doesn’t work if the drag area has splits in it.
Whilst shaking my finger at Blender, I poked around with Jupyter using SciPy and ImageDraw to figure out some curves that may work. It was interesting to play with SciPy’s Curve class, but I settled on simple parametric positions based on ease-in-out animation curves, tweaking the speeds using power functions. Here’s an early sketch:
from math import sin, cos, pi

# Animation ease curves via https://gist.github.com/th0ma5w/9883420
def easeInOutSine(t):
    return (1 - (cos(pi * t))) / 2

def px(d, u):
    return d + (1 - d) * d**.01 * sin(easeInOutSine(u**8.1) * pi) ** 1.2

def py(d, u):
    return sin(easeInOutSine(u**4) * pi) ** 2
The d value in px and py is the distance from the up axis of the point at the start. Combining d with an angle theta and u = 0 will determine the starting position a point in the 2D plane, then interpolating 0 <= u < 1 generates the shape.
These are curves for various d values between 0 and 1:

Next up I need to generate shapes in Blender script and use these curves to generate animation keyframes.
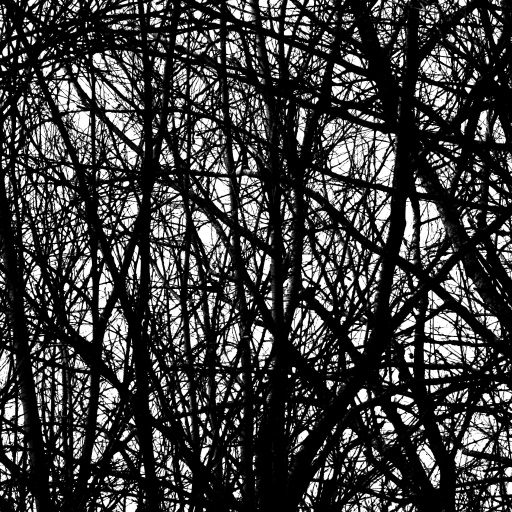
Overlaying Stuff
An early experiment from various photos today. The best way to get these shots is midday with cloud coverage for a good silhouette, these were late in the day so grainy and catching too much light. Good to play though and it’s got me in the mind to do the final version using old camera film and process and expand onto acetate at home